Teachers are the unsung heroes of our communities, dedicating countless hours to shaping young minds. They deserve comfort, professionalism, and a touch of personal flair in their everyday attire. That's where custom polo shirts come in! More than just a uniform, a well-designed polo can foster team spirit, enhance school identity, and provide a comfortable, practical option for busy educators. But how do you go from a brilliant idea to a tangible shirt? The key lies in understanding how to effectively view and approve your custom polo shirt designs, especially when working with high-quality PNG files.
This article will guide you through the exciting process of bringing your custom teacher polo shirt designs to life. We'll explore why custom polos are a fantastic choice for educators, delve into the importance of the PNG file format for optimal viewing, and provide a step-by-step guide on how to confidently view and finalize your perfect design. Get ready to transform your vision into stylish, professional, and comfortable apparel for every teacher!
Why Custom Polo Shirts for Teachers?
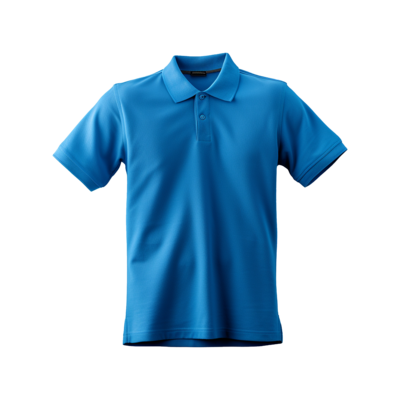
Custom polo shirts offer a unique blend of benefits that make them ideal for teachers and school staff. They strike a perfect balance between casual comfort and professional appearance, making them suitable for a wide range of school activities.
For starters, custom polos promote a sense of unity and team spirit among staff members. When teachers wear coordinated apparel, it creates a cohesive look that can be particularly impactful during school events, parent-teacher conferences, or field trips. It helps students and parents easily identify staff members, contributing to a safer and more organized environment.
Beyond unity, custom polos are excellent for school branding. Featuring the school logo, mascot, or motto, these shirts become walking advertisements for your institution. This is especially beneficial when teachers represent the school off-campus, such as at educational conferences or community outreach programs. It reinforces the school's identity and pride.
Practically speaking, polo shirts are incredibly versatile and durable. They are often made from breathable, easy-care fabrics that can withstand the rigors of a busy school day, from leading classroom activities to supervising playground duty. They offer a professional alternative to t-shirts while still providing the comfort and freedom of movement that teachers need.
The Power of PNG: Why This File Format Matters for Your Design
When you're designing custom apparel, the file format of your logo or graphic is crucial. Among the various options, PNG (Portable Network Graphics) stands out as the superior choice for viewing and preparing your custom polo shirt designs, especially for professional applications like school branding.
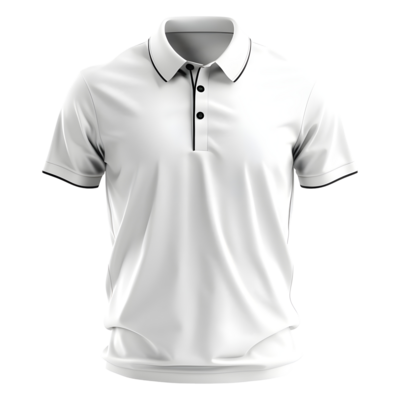
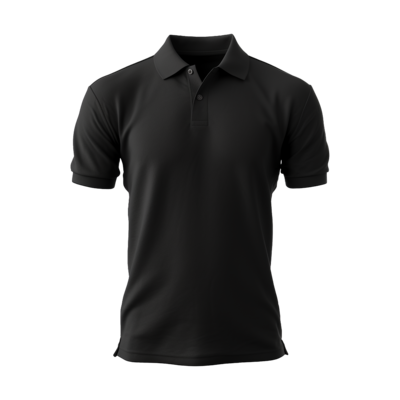
The primary advantage of a PNG file is its support for transparency. Unlike a JPG file, which will always have a solid background (often white), a PNG can have a transparent background. This means that your school logo, mascot, or custom text can appear seamlessly on any color polo shirt without an unsightly white box around it. Imagine a vibrant school emblem placed directly onto a navy blue polo – with a PNG, it looks clean, crisp, and professional. With a JPG, you'd likely see a white square surrounding your logo, detracting from the overall aesthetic.
Furthermore, PNGs use lossless compression, which means that when the file is saved, no image data is lost. This preserves the quality and sharpness of your design, ensuring that intricate details, crisp lines, and vibrant colors are accurately represented. This high fidelity is essential for ensuring your school's logo looks its best, whether viewed on a screen or printed on fabric.
In essence, using a PNG file for your custom polo design guarantees that what you see on your screen is precisely what you'll get on the shirt, with a clean, professional finish that truly elevates your custom apparel.
Step-by-Step: How to View Custom Polo Shirt Designs for Teachers (PNG)
Now that we understand the 'why,' let's dive into the 'how.' Viewing your custom polo shirt design effectively, especially with a PNG file, is a straightforward process when you know the steps. This ensures you're completely happy with the final product before it goes to print.
Step 1: Brainstorm Your Vision
Before you even think about files, gather your ideas. What message do you want the polo to convey? Consider your school's colors, mascot, motto, or any specific departmental themes. Think about the placement of the design – a small logo on the left chest, a larger design on the back, or even a subtle detail on the sleeve. Involving other teachers or school administrators in this initial brainstorming phase can lead to a more universally loved design.
Step 2: Find a Reputable Design or Customization Service
Your choice of vendor is critical. Look for custom apparel companies that specialize in school or corporate wear. These companies often have extensive online design tools or dedicated design teams. Local screen printers or embroiderers can also be excellent options. Ensure they have a good reputation for quality and customer service.
Step 3: Upload or Create Your Design (Focus on PNG)
If you already have a school logo or graphic, make sure you have it in a high-resolution PNG format. If you're working with a designer, specifically request the final logo files in PNG. If you're using an online design tool, you'll typically have an option to upload your existing PNG file. If you're creating a design from scratch within their platform, ensure that any elements you add (like text or clip art) will be rendered with a transparent background if placed on a colored shirt.
Step 4: Utilize Online Design Tools and Mock-ups
Most custom apparel websites feature interactive design studios. This is where the magic happens! You can typically:
- Select the polo shirt style, color, and size range.
- Upload your PNG logo or graphic.
- Drag and drop your design onto different areas of the shirt (front, back, sleeve).
- Adjust the size, rotation, and placement of your PNG design.
- Preview the design on a virtual model or a flat-lay image of the polo shirt. This "view custom polo shirt design for teachers png" feature allows you to see exactly how your transparent PNG will look on the chosen shirt color.
Experiment with different colors and placements to find the perfect combination. The beauty of the PNG is that it will adapt seamlessly to whatever background color you choose for the polo.
Step 5: Request Digital Proofs (PNG Format)
Once you've finalized your design using the online tools, or if you're working directly with a designer, always request a digital proof before production begins. Insist that this proof be provided in a high-quality PNG format. This proof is a critical step for your "view custom polo shirt design for teachers png" process.
Carefully examine the proof for:
- Accuracy of the logo/design: Is it the correct version?
- Colors: Do the colors match your expectations (keeping in mind screen variations)?
- Placement and size: Is the logo positioned exactly where you want it and at the right scale?
- Spelling and grammar: Double-check any text for errors.
- Overall appearance: Does it look professional and appealing?
This is your final opportunity to make any adjustments, ensuring the finished product meets your expectations.
Step 6: Share and Get Feedback
One of the great advantages of having your design in a PNG format is how easily it can be shared. Email the PNG mock-ups to your colleagues, department heads, or school administration for their input. Since PNGs are widely supported and maintain their quality, everyone can view the design clearly without needing special software. Gathering feedback ensures that the final design is well-received by everyone who will be wearing it.
Tips for a Standout Teacher Polo Design
To ensure your custom teacher polos are truly exceptional, keep these tips in mind:
- Keep it Simple and Clean: Overly complex designs can look cluttered. A clean, legible design is often the most effective.
- Choose Appropriate Colors: Stick to your school's official colors or complementary shades that project professionalism.
- Consider Embroidery vs. Screen Printing: For a more premium and durable look, especially for logos, embroidery is often preferred for polos. Screen printing is great for larger, more graphic designs. Discuss options with your vendor.
- Think About the Fabric Blend: Polos come in various materials (cotton, polyester, blends). Consider breathability, wrinkle resistance, and durability when making your choice.
- Ensure Legibility: Make sure any text or intricate details in your PNG design are clear and readable, even from a distance.
Creating custom polo shirts for teachers is a fantastic way to boost morale, promote school spirit, and provide comfortable, professional attire. By understanding the importance of the PNG file format and following a systematic approach to viewing your designs, you can ensure that the final product is exactly what you envisioned. From brainstorming ideas to approving the final digital proof, each step contributes to a successful outcome that teachers will be proud to wear.
In summary, this article has highlighted the numerous benefits of custom polo shirts for teachers, emphasizing their role in fostering unity and school identity. We delved into the critical importance of using PNG files for design transparency and quality, ensuring a professional finish. The step-by-step guide provided a clear roadmap for viewing custom polo shirt designs, from initial brainstorming and vendor selection to utilizing online design tools, requesting digital proofs, and gathering feedback. Finally, practical tips were offered to help create truly standout designs, ensuring that every teacher can wear their custom polo with pride and comfort.